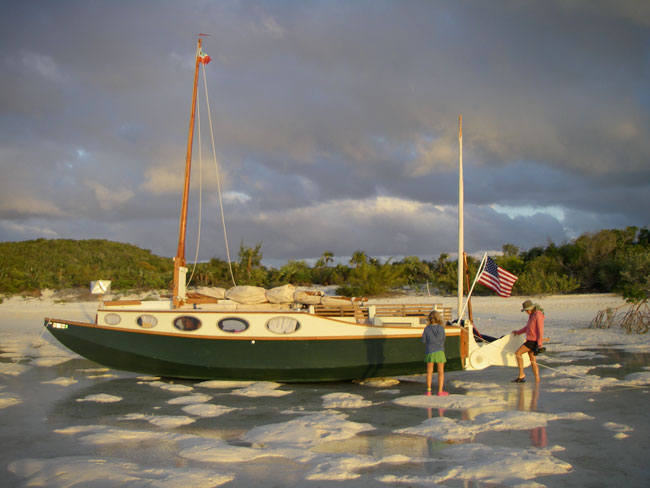
Couldn't resist running this great photo again of Garth Battista's Cormorant on his recent Bahamas cruise.
Ā
Contents:
Ā
Contact info:
Jim Michalak
118 E Randall,
Lebanon, IL 62254Send $1 for info on 20 boats.
Ā
Jim Michalak's Boat Designs
118 E Randall, Lebanon, IL 62254
A page of boat designs and essays.
(1June10)This issue will rerun the article about putting a new bottom on AF4. The 15 June issue should, with a little luck, be about the 2010 Rend Lake meet.
THE BOOK IS OUT!
BOATBUILDING FOR BEGINNERS (AND BEYOND)
is out now, written by me and edited by Garth Battista of Breakaway Books. You might find it at your bookstore. If not check it out at the....ON LINE CATALOG OF MY PLANS...
...which can now be found at Duckworks Magazine. You order with a shopping cart set up and pay with credit cards or by Paypal. Then Duckworks sends me an email about the order and then I send the plans right from me to you.
MESSABOUT NOTICE:
THE REND LAKE MESSABOUT WILL TAKE PLACE ON JUNE 11 and 12 AT THE NORTH SANDUSKY CAMP GROUND AT REND LAKE IN SOUTHERN ILLINOIS. ALL OF THE SANDUSKY CAMP GROUNDS ARE FULL AS FAR AS I CAN TELL FOR THAT WEEKEND. THE GUN CREEK CAMP GROUND THAT WE USED FOR YEARS HAS BEEN CLOSED. BUT OUR BOATERS HAVE RESERVED SOME OF THE SITES AT NORTH SANDUSKY, ESPECIALLY IN THE SECOND CAMPSITE LOOP, SO YOU (AND I) MIGHT PASS THAT WAY FIRST SINCE USUALLY SEVERAL TENTERS CAN SHARE A CAMPSITE. IF NOT, THEN I WOULD TRY THE WAYNE FITZGERRELL STATE CAMPGROUND WHICH IS ON THE MAIN CAUSEWAY LEADING TO SANDUSKY. THEIR WEBSITE SAYS IT IS STRICTLY FIRST COME FIRST SERVE, NO RESERVATIONS ALLOWED. IT IS A VERY QUICK DRIVE FROM THERE TO SANDUSKY. HOPE TO SEE YOU THERE!
Ā
AF4 Bottom 2
NOW, WHERE WAS I....
...I was trying to put a new bottom on my old AF4.
THE GRAND PLAN WAS....
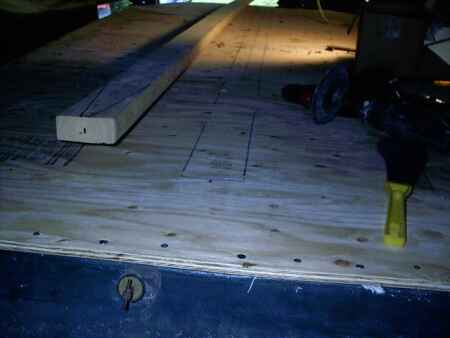
...to saw away the old bottom an inch or two inside the hull sides leaving a bit of the old bottom to form a flange of sorts to attach the new bottom, like this:

The cutting went quickly and sort of looked like this:
... THEN MY BEST PLANS SORT OF WENT TO HELL...
The idea was to use 5/8" plywood (which now is really 19/32") and I bought three sheets of that. Nice looking stuff at a good price I thought. I got it home and starting drawing cutting lines on it and then noticed the printing on it "Exposure 1" and not exterior as stated by the lumber yard. I googled "exposure 1" and found it means you can leave it out for up to a month without protection, as in boxing in a house before siding or roofing. To me that meant it wasn't really waterproof. I bought more sheets of "exterior" so marked but they had no 5/8", so I got 1/2" which is really 15/32" Oh well!
I called around and found Max and Rob had used PL glues with success and I had used some in the original AF4 construction with success so I went back for more. I had used PL Premium but the store only had big tubes of PL400 which also said "waterproof" and was the stuff that Rob had used. So I started fitting the new panels from bow aft.
PL400 is interesting stuff and I don't totally understand it. Comes in a big calking gun tube so is pretty easy to use in that way. Not too expensive. It looks exactly like chewing gum, thin gum when it comes out of the tube and very thick gum when it sets. I don't know if it ever gets totally hard in the usual sense. I have reservations about using such glue in places but here I felt it would be OK. I had a huge glue surface and I was using lots of nails and screws. In a way for me the PL was similar to a sealant. And on top of all that I was going to epoxy tape the outer joint and epoxy putty fillet the inside joint.
Well, with the thickness of the PL it is sometimes hard to get "squeeze out" of the joint since my screws and nails at times simply couldn't squeeze hard enough. And there was another problem. My hardware stores Pl supply was dated and about half of the tubes I bought were set up in the tube and since it doesn't get rock hard when set I couldn't tell by thumping on the tube if it was good or bad. They repaid me for the bad tubes but I lost a day in the scramble and had to get new stuff at Home Depot. Home Depot has PL Premium and it is slightly different from PL400 and I finished the job with that.
A bow view just before fitting the bottom skid looked like this:
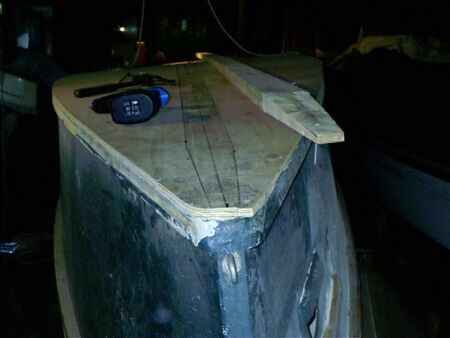
Stern view like this:
By the time I got around to fit the bottom skid I was running out of PL. The skid was going to fit tightly and I switched to Titebond2 for that part, with lots of screws.
TRIMMING THE EDGES...
... went quickly with those 24 grit sanding disks I bought at Napa for my drill fitted with a 5" rubber sanding disk. In fact I only used one disk since it refused to wear out or clog! OH JOY! WHERE HAVE YOU DISKS BEEN ALL MY LIFE! If I get to heaven I expect to see the guys who invented bondo, the sheetrock screw, and the 24 grit disk all sitting on the highest cloud in Heaven!
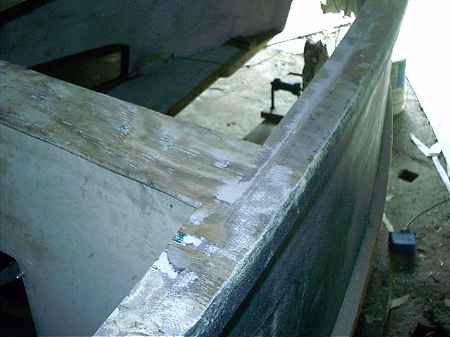
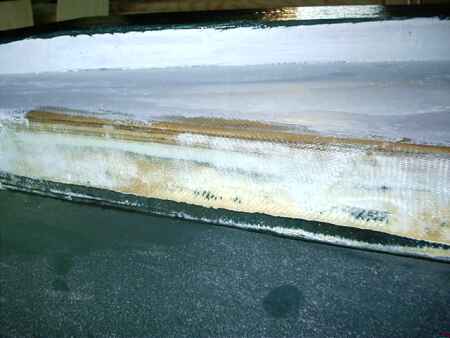
A look at the chine after the first grinding looked like this:
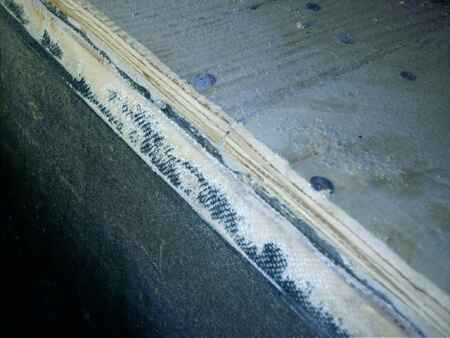
You can see the new plywood layer. You can see the original chine with original glass ground just enough to remove the original paint. In between those you will see a green line which is the painted radius of the original bottom. The new bottom now overhangs it a bit. I filled that old radius with Bondo and ground it smooth and added a quick new radius on the new plywood. Like this:
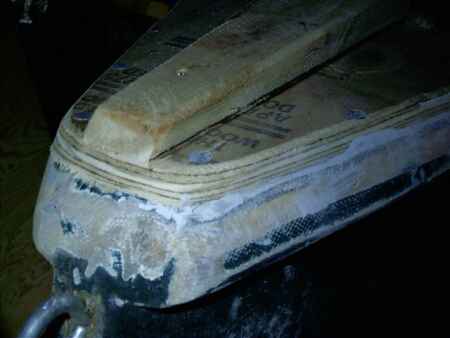
NOW TO ARMOR THE EDGES...
I got some epoxy from Duckworks, 3/4 gallon kit of the cheapest flavor. It worked perfectly. It mixes one part to two and I always like to show how I do that. Here it is:
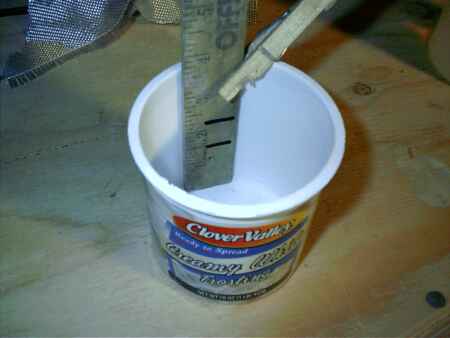
You need a glue jar with straight sides and a flat bottom (although a common tin can with top removed will work well). What I have here is the best glue jar I know of, a cake frosting tub. You can usually get two cakes from one tub so you see what a good value it is. I am showing a "creamy white" frosting tub here and I must tell you that the "chocolat fudge" is actually even better.
Anyway, you see the stick clamped to the side of the tub with a clothespin. The stick is marked 1-1/2" up from the bottom and again 3/4" above that mark. Fill with epoxy resin to the first mark and then to the second with hardener and there you have an accurate 2to1 mix. Of course if you have a hardener requiring a different ratio you set you top mark to suit. If you need more epoxy than shown you use deeper marks but it will be fine as long as the proper ratio is maintained. I know they sell fancy pumps for this but by my experience they are not totally reliable, especially with cold and thick epoxy.
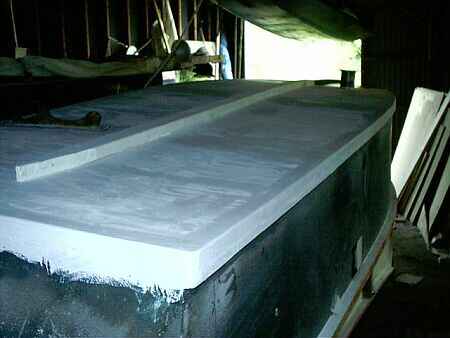
So I went around the perimeter of the new bottom with a layer of glass like this:
You see the primer is about to close in on the chine above. The painting of the wide open spaces of the bottom looked like this:
Almost forgot to say that I also glassed over the butt joints and put a daub of epoxy on any fastener that wasn't under fiberglass. There were only a few uncovered nails and I use galvanized roofing nails for this sort of work as a rule.
Then I got another quart of Hunter Green latex and gave it a coat. Not much paint on the bottom but who will notice? The first finish was the same and it held fine for ten years.
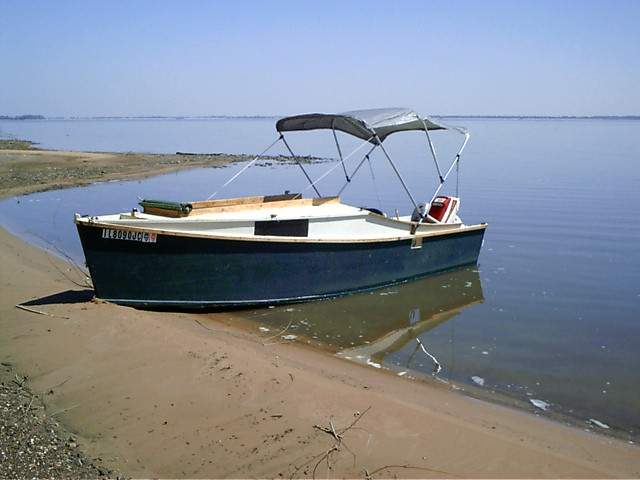
NOW TO FLIP IT UPRIGHT...
I have to do this sort of thing myself. I yanked the Birdwatcher out of the shed to a safe place and found some plywood and a bunch of old fenders to ease the crash that would result from the solo flip. Recall that he boat was not on the floor at the time but instead was upside down on its trailer so it was maybe 24" above the floor. Nothing to do but wiggle it over the side of the trailer and rotate it as it went. CRASH! Woke up the neighbors. It started to land on its feet but over rotated into the wall of the building, then slowly rotated back on its feet. When the dust settled I found no damage, at least not to the boat. That was easy.
Now to get it back on the trailer but how? I couldn't find my cable hoist to pull it up to the rafters and slide the trailer under. I recalled motor guru Max telling me he could get any boat on its trailer from the ground up. Back the trailer to the hull, hook up the trailer winch to the bow eye, tip the trailer down and the bow up until the bunks are started under the bow. Winch boat onto trailer. Easy as pie! Like this:
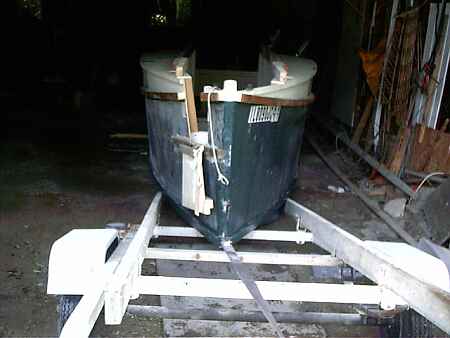
Next time I'll finish the interior and give it the launch.
Ozarkian
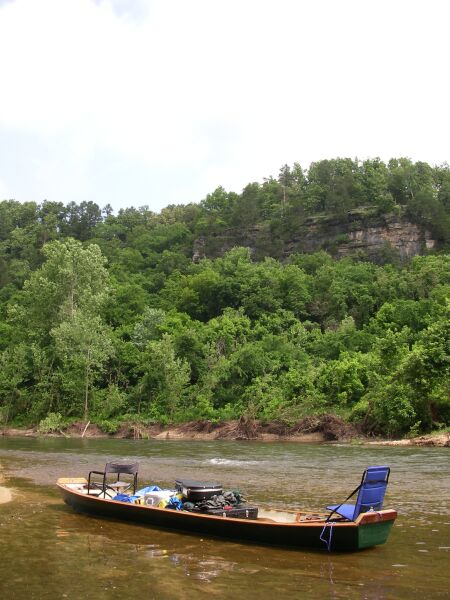
OZARKIAN, DRIFT BOAT, 20' X 4', 200 POUNDS EMPTY
I do a "retro" design every now and then, an old design redone with modern techniques. Max Wawrzyniak sent me a wonderful copy of the article "Ozark John Boat" by Townsend Godsby, printed in the "Sports Afield Boatbuilding Annual" in 1956. I live on the edge of the Ozark Mountains right now and have seen have seen some of the beautiful streams mentioned in the article. These are small shallow rivers, clear and beautiful, that slide and riffle over clean gravel beds at about a walking pace. In the summer it gets really hot around here and it is still a happy way to kill time to float those rivers in aluminum canoes. In popular spots you could swear you could walk across the river by stepping from canoe to canoe, your ears treated to the sounds of birds, rippling water, and laughter, all to the beat of canoes crashing into each other. The Ozark jon boat predates the aluminum canoe by quite a bit, Godsey's article quoting a builder that had been floating the river as a fishing guide in his jon boats since 1900 and even then the design was well established.
The traditional Ozark boat is in some ways better than the aluminum canoe. For one thing it carries a huge load, being 20' long, 4' wide, and having a dead flat bottom. It is a drifting barge. Godsey gives the basic use: load with fishing guide and "sport" and gear to float 125 miles from Galena to Branson, Missouri, (first home of the mythical Jed Clampett), in five days. No motor, just a paddle for the guide to steer with. At Branson it all got shipped back to Galena (just 24 miles away by land) by rail for the next trip. In the old photos the amount of gear carried is enormous. The boats have seats in the ends but the photos show the people sitting very comfortably in canvas director's chairs.

Construction in 1956 was what one could expect. You start with something you might not find at your lumberyard today - five "clean" pine boards 1" x 14" x 20' long. Three boards make the bottom with tongue and groove joints and one board makes each side, so these boats aren't too big on freeboard. I've shown wooden frames where the original boats had metal frames made from old iron wagon tires! The list of materials also included 15' of "Cow chain", whatever that is. I should add that I think a similar boat, but with pointy ends, was used in a similar way in Michigan that dragged a length of heavy chain from its stern, keeping the boat pointed reliably downstream.
Well, my Ozarkian uses standard simple plywood "instant" construction needing five sheets of 3/8" plywood. "They ain't nothin' to makin' a John boat," said Charlie the old guide. "Any hillbilly kin do it."
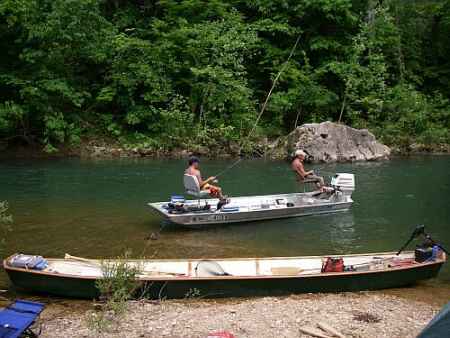
Well, Kyle Kosovich in Springfield, Mo, built the prototype. He knew the history of the boats and is using his just as the old ones were used, (which is pretty unusual). Don't even ask me about putting power on such a long light hull. You are on your own there. Remember these were never used at high speeds or in big open water. They are slow stream drifters. Here is Kyle's boat in the very waters the original boats floated:
He sent another with a modern normal boat in the background to give the Ozarkian some scale:
And here is Kyle on his first voyage:
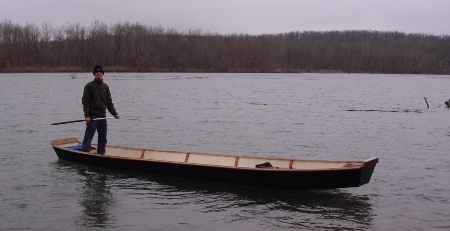
Kyle added: "It was a dream to run the river with. We floated on the Bryant Creek and caught smallmouth, and ran limb lines with the trolling motor for catfish. The trolling motor pushed it easily. This boat is great. I repeatedly over corrected it while fishing, all it takes is a little tip of the paddle to keep it straight. It is a lot easier than a canoe to steer."
Great job!
Plans for Ozarkian are $25.
Prototype News
Some of you may know that in addition to the one buck catalog which now contains 20 "done" boats, I offer another catalog of 20 unbuilt prototypes. The buck catalog has on its last page a list and brief description of the boats currently in the Catalog of Prototypes. That catalog also contains some articles that I wrote for Messing About In Boats and Boatbuilder magazines. The Catalog of Prototypes costs $3. The both together amount to 50 pages for $4, an offer you may have seen in Woodenboat ads. Payment must be in US funds. The banks here won't accept anything else. (I've got a little stash of foreign currency that I can admire but not spend.) I'm way too small for credit cards.
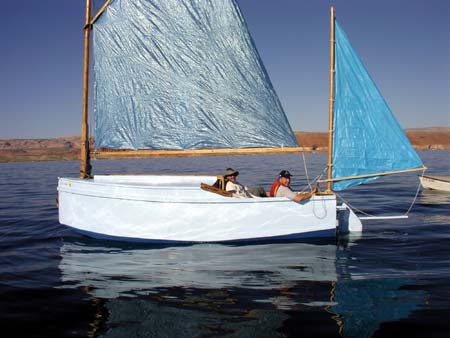
I think David Hahn's Out West Picara is the winner of the Picara race. Shown here on its first sail except there was no wind. Hopefully more later. (Not sure if a polytarp sail is suitable for a boat this heavy.
Here is a Musicbox2 I heard about through the grapevine.
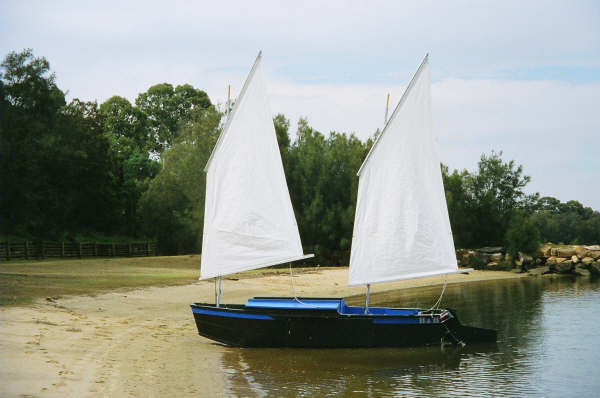
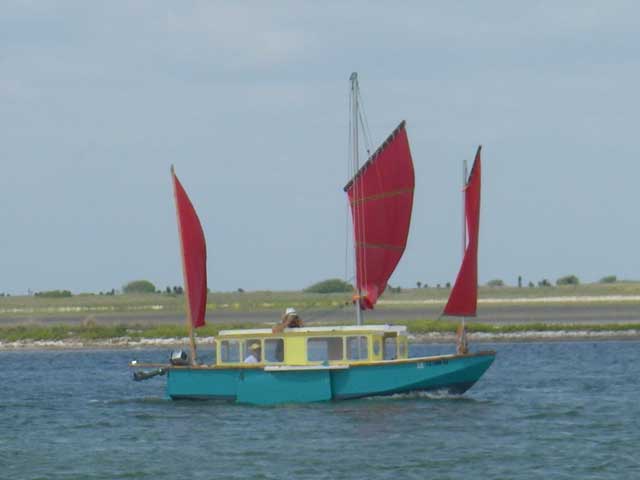
This is Ted Arkey's Jukebox2 down in Sydney. Shown with the "ketchooner" rig, featuring his own polytarp sails, that is shown on the plans. Should have a sailing report soon.
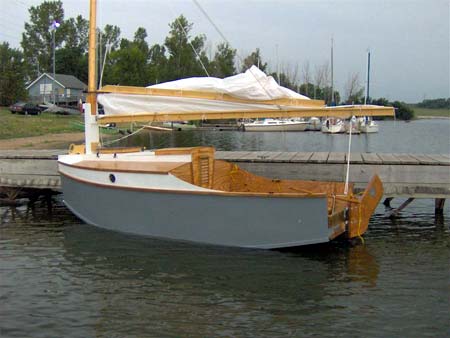
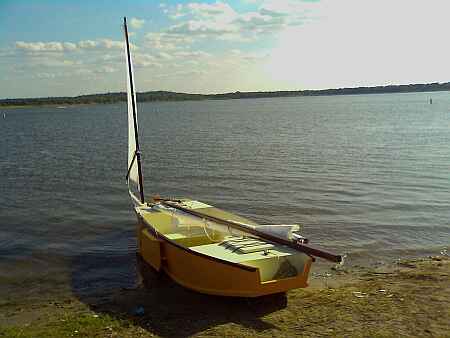
And the Vole in New York is Garth Battista's of www.breakawaybooks.com, printer of my book and Max's old outboard book and many other fine sports books. Beautiful job! Garth is using a small lug rig for sail, not the sharpie sprit sail shown on the plans, so I will continue to carry the design as a prototype boat. But he has used it extensively on his Bahamas trip towed behind his Cormorant. Sort of like having a compact car towed behind an RV.
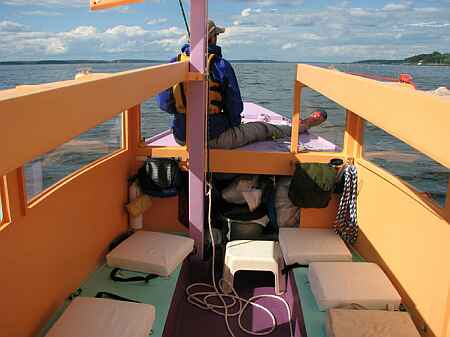
A view of the Caroline prototype showing a lot of the inside, crew on fore deck. Beautiful color:
And here is another making I think its maider voyage in the Texas 200. (I'm told the Chinese rig will be replaced by the blueprint rig.)
I gotta tell you that on the Caroline bilge panels I made an error in layout and they are about 1" too narrow in places on the prototype plans. I have them corrected but it always pays, even with a proven design, to cut those oversized and check for fit before final cutting.
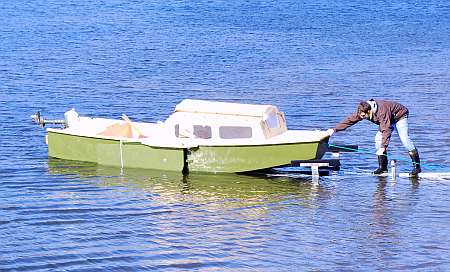
And a Deansbox seen in Texas:
A Twister gets launched, tightrope walking down a slippery trailer tongue with freezing water just below, I've been there too. Used for now as low powered boat, awaiting its sail rig. Nice job!
AN INDEX OF PAST ISSUES
Hullforms Download (archived copy)
Plyboats Demo Download (archived copy)
Brokeboats (archived copy)
Brian builds Roar2 (archived copy)
Herb builds AF3 (archived copy)
Herb builds RB42 (archived copy)